Guide to Choosing Effective Under Eye Treatments
om lighting and immediately screenshotted it to my dermatologist like, “Explain this.” That moment sent me down a two-year rabbit hole of eye creams, patches, lasers, concealers, and one very questionable jade roller I still regret.
This guide is everything I wish I’d had before wasting money on products that did nothing except make my under eyes feel slightly more… wet.
Step 1: Figure Out What You’re Actually Treating
Most people say “I need something for my dark circles,” but under the umbrella of “tired eyes” there are very different problems — and each needs a different solution.
From my experience (and confirmed repeatedly by derms I’ve badgered), you’re usually dealing with one or more of these:
- Pigmentation – Brownish, shadowy color, usually from genetics, sun exposure, or post-inflammatory hyperpigmentation.
- Vascular dark circles – Purplish/blue tone from visible blood vessels and thin skin.
- Puffiness – Morning swelling, salt or alcohol related, or just fluid retention.
- True eye bags (fat pads) – Persistent bulging that doesn’t fully go away, even when you sleep well.
- Fine lines and crepey texture – Those little “accordion lines” when you smile or squint.
Quick self-check I use
- Look straight ahead in good light.
- If the darkness moves when you tilt your head or change lighting, a lot of it is from shadows/volume loss.
- Gently pull the skin downward.
- If the color doesn’t change much, it’s likely pigmentation.
- If it gets lighter, it may be vascular (vessels showing through).
- Press a cold spoon or ice pack wrapped in cloth for a minute.
- If puffiness improves a lot, it’s fluid-related.
- If it barely budges, it may be fat pad/herniation.
Once I separated my own issues (for me: a combo of mild pigmentation, some vascular show-through, and early volume loss), products suddenly became easier to judge. Not miracles, but at least logical.
Step 2: Know Which Ingredients Actually Do Something
After testing more eye products than I’d like to admit, I quietly unsubscribed from the idea that “all eye creams are useless.” Some are, absolutely. Others do exactly what they claim — if you match them correctly to your issue.
For pigmentation and uneven tone
When I tested brightening formulas, the ones that genuinely helped had at least one of these:
- Vitamin C (L-ascorbic acid or derivatives) – Antioxidant, helps with brightness and collagen. Look for ~5–15% in serums (eye formulas are often gentler).
- Niacinamide – Multi-tasker: brightening, barrier support, mild anti-inflammatory.
- Licorice root extract, kojic acid, tranexamic acid – More targeted pigment modulators, usually in low percentages under the eyes.
These work slowly. For me, it took about 8–12 weeks of daily use to notice a visible difference, and I had before-and-after photos to keep myself sane.
For fine lines and crepey skin
The biggest change I saw came when I (carefully) introduced retinoids:
- Retinol / retinaldehyde – Speeds up cell turnover, boosts collagen production.
- Bakuchiol – A gentler, retinol-adjacent ingredient that some people tolerate better.
Under the eyes, irritation is very real. I learned the hard way by going in too strong and spending a week with red, flaky eyelids. Now what works for me:
- Use a “sandwich” method: thin layer of bland moisturizer, retinoid pea-size for both eyes, then moisturizer again.
- Start 2 nights per week, slowly moving up as tolerated.
For puffiness and temporary bags
If your under eyes balloon after sushi night and mysteriously deflate by lunch, you’re likely dealing with fluid retention, not permanent fat pads.
What helped me most:
- Caffeine – It’s a vasoconstrictor and can reduce the appearance of puffiness and darkness. Many eye serums use 0.5–5% caffeine.
- Cold – Honestly, chilled eye patches or a cold spoon often outperform fancy serums for short-term de-puffing.
- Light massage – Gently tapping from inner to outer corner can help lymphatic drainage (gently is key; the skin is thin).
For dryness and irritation
Sometimes the main problem is simply that the under eye is dry and textured, which makes everything look worse under makeup.
I’ve had good results from:
- Ceramides – Support the skin barrier.
- Hyaluronic acid – Hydrates, but I always seal it in with a cream; otherwise it can actually feel drying.
- Squalane, shea butter, glycerin – All reliable, boring in the best way.
Step 3: Match Expectations to Reality (and Maybe a Derm)
There’s a point where no eye cream on earth will fix what’s bothering you — and that’s not your fault or the product’s fault; it’s anatomy.
When topical products might be enough
Based on my experience and what dermatologists repeatedly say:
Topicals work best for:
- Mild to moderate pigmentation
- Early fine lines and texture
- Fluid-based puffiness
- Slight improvement in vascular darkness (via skin thickening and support)
When in-office treatments make more sense
I reached this point when I realized my persistent “shadow” was from volume loss and the way my cheek and eye area connected. No cream could physically fill that. I eventually tried:
- Hyaluronic acid filler in the tear trough – Done by an experienced injector only. When I tested this, the change was subtle but real: the shadowing reduced a lot. Downsides: cost, risks (bruising, swelling, rare but serious vascular complications), and maintenance every 1–2 years.
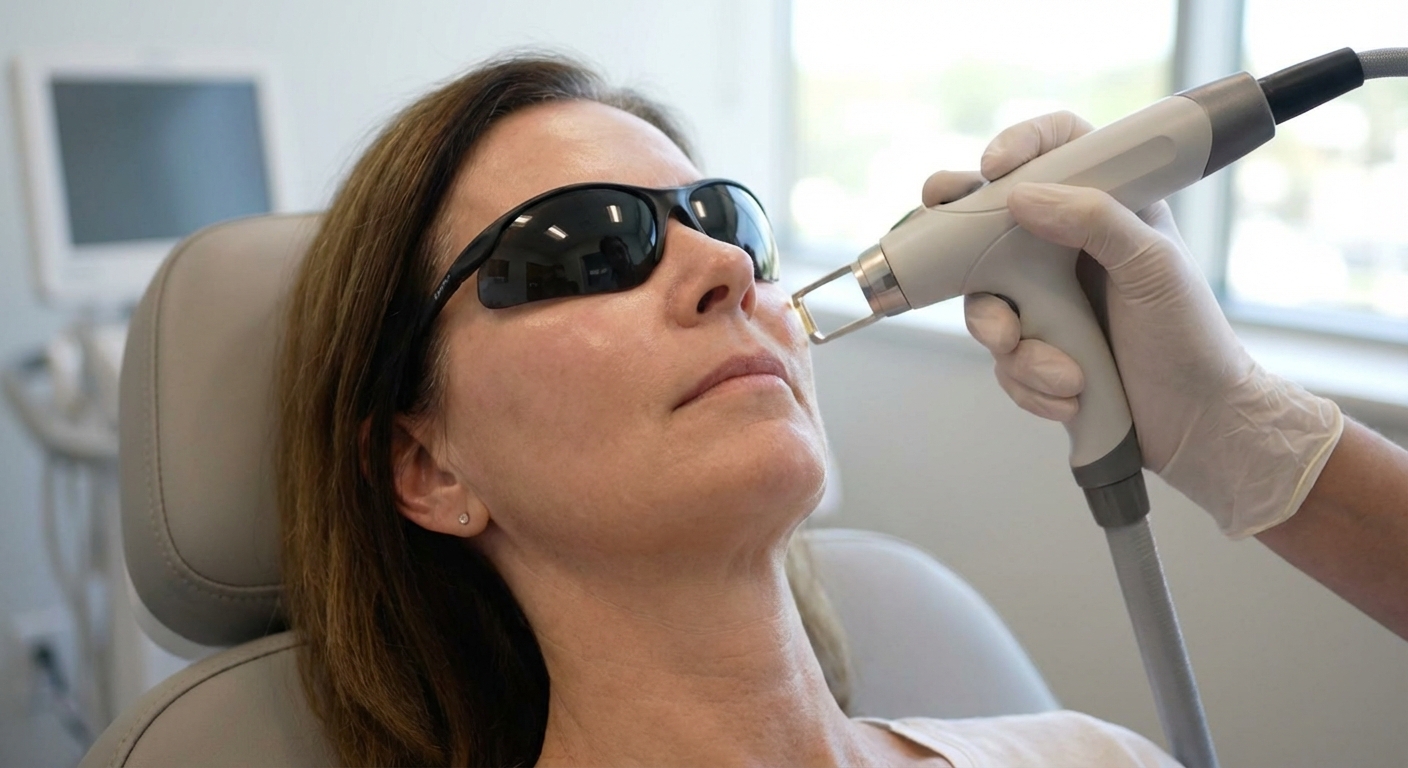
- Non-ablative laser (like Fraxel) around the eyes – Helped with texture and mild pigmentation for me, but required downtime and strict sunscreen.
For pronounced fat pad eye bags or very lax skin, multiple dermatologists told me bluntly: “No cream will fix that. Surgery (blepharoplasty) is the gold standard.” It’s not a casual decision, but hearing it framed honestly helped me stop expecting miracles from a $50 jar.
Step 4: How to Read Eye Cream Labels Like a Pro
After enough trial and error, I started using a simple mental checklist before buying anything new:
- Are key ingredients listed high enough?
- If caffeine, niacinamide, or peptides are buried at the very bottom of the list after fragrance, I pass.
- Is it fragrance-free or very low fragrance?
- The under eye area is sensitive. I personally avoid strong scents here after reacting to a “luxury” cream that made my eyes water all day.
- Is the packaging airless and opaque?
- Vitamin C and retinoids hate light and air. Jars that you keep opening can make these ingredients degrade faster.
- Are the claims specific or vague?
- “Reduces visible puffiness in 4 weeks” with some kind of data = better.
- “Awakens the eye area with luminous vitality” = translation: marketing.
One brand I tested even claimed “clinically proven to reduce wrinkle depth by 32%,” but when I looked it up, it turned out to be an in-house, tiny, unpublished study. Not useless, but not something I’d treat like gospel.
Step 5: Layering with Makeup Without Creating Crease City
I learned quickly that even the best eye cream can ruin your concealer if it’s too heavy or applied wrong.
What works well for me:
- Morning: lightweight, hydrating eye serum or gel → let it sit 5–10 minutes → thin layer of concealer.
- If my concealer pills, it’s almost always because:
- I used too much product, or
- I didn’t give it time to absorb.
On days I’m shooting or know there’ll be photos, I use a caffeine serum under the eyes and keep my richer creams for nighttime only. That combo tends to look the smoothest on camera.
The Honest Truth About “Results” Timelines
From all my testing, here’s the rough timeline I’ve personally experienced and seen echoed in studies and expert interviews:
- Instant: hydration, plumping from humectants, mild de-puffing from cold and caffeine.
- 2–4 weeks: small improvement in dryness, concealer goes on smoother, slight brightness.
- 8–12 weeks: more noticeable changes in pigmentation, fine lines, and texture — if the formula is well-designed and you’re consistent.
- 3–6 months: structural improvements with retinoids and certain peptides, often subtle but real.
If something promises total transformation in 7 days, I automatically downgrade my expectations to “nice moisturizer.”
Who Should Be Extra Careful
From my experience and what derms repeatedly caution:
- If you have eczema, rosacea, or very reactive skin – Patch test on the outer orbital area first.
- Contact lens wearers (like me some days) – Go lighter with creamy textures; heavy balms can migrate into the eye.
- If you’re using prescription retinoids already – Layering too many actives can quickly lead to irritation.
And always, always: sunscreen around the eyes, even if it’s a dedicated mineral stick or a tested formula that doesn’t sting. Nearly every dermatologist I’ve spoken to emphasized this more than any specific eye cream.
The Takeaway I Wish I’d Learned Sooner
Eye treatments absolutely can help — just not with everything, and not overnight.
Once I:
- identified what my actual under eye issues were,
- picked ingredients that matched those problems,
- adjusted my expectations to what topicals can realistically do,
…I stopped hate-buying random products at 1 a.m. and started seeing slow, steady improvement. My under eyes still look like a human’s, not an airbrushed ad, but the difference between my old bathroom selfie and my current one is enough that I no longer panic-text my dermatologist.
If you remember nothing else from this whole guide, remember this: diagnose first, then shop. Your wallet — and your under eyes — will thank you.
Sources
- American Academy of Dermatology – Dark circles under the eyes: Causes and treatments - Overview of causes and evidence-based treatment options.
- Cleveland Clinic – Dark Circles Under Eyes - Medical explanation of types of dark circles and management.
- Harvard Health Publishing – The lowdown on eye creams - Discussion of what eye creams can and can’t do.
- Mayo Clinic – Retinol: Creams, Serums and Skin Care - Expert insight on retinoids and their effects on skin.
- National Institutes of Health – Caffeine and the skin - Research article detailing caffeine’s dermatologic effects, including de-puffing and antioxidant activity.