Guide to Hydroponic Farming for Beginners
y plant in a plastic tub, no dirt in sight, produced fruit that tasted like it came straight from a high-end farmer’s market.
That little tomato sent me down a rabbit hole that you’re probably peeking into right now: hydroponic farming.
If you’ve ever thought, “I don’t have a yard, but I really want to grow my own food” or “My herbs always die on the windowsill”, this guide is for you.
What Hydroponic Farming Actually Is (Without the Jargon)
Hydroponic farming is growing plants in a nutrient-rich water solution instead of soil. The roots sit in or above that water and get exactly what they need: water, nutrients, and oxygen.
Under the hood, though, there’s a bit more going on:
- Water replaces soil as the delivery system.
- Nutrients are dissolved mineral salts (think calcium nitrate, potassium phosphate, etc.).
- Oxygen comes from air stones, pumps, or simply leaving part of the roots in open air.
When I first tried this, I pictured some complicated NASA setup with blinking LEDs and tubes everywhere. The reality? My first “system” was literally a black storage tote, a cheap aquarium pump, and net cups.
Why Hydroponics Is Worth Trying (And When It’s Not)
In my experience, hydroponics shines in three situations:
- Limited space – Apartment balcony, spare room, or even a closet with a grow light.
- Harsh climate – Too hot, too cold, or too short a growing season.
- You like control – If you’re the kind of person who tweaks coffee ratios or fiddles with your thermostat, you’ll love dialing in nutrient levels.
Big Pros
- Faster growth – Studies from the University of Arizona’s Controlled Environment Agriculture Center have shown leafy greens can grow 20–50% faster hydroponically compared to soil under the same conditions.
- Higher yields per square foot – You’re stacking vertical, using tight spacing, and pushing optimum conditions.
- Uses less water – The FAO and multiple research groups report up to 80–90% less water use than conventional soil growing because you recirculate the solution.
- No weeding – My back thanks me every single day.
- Fewer soil-borne pests – No soil, no fungus gnats party (well, fewer invites, anyway).
Honest Cons
- Startup cost – Even a basic system with a timer, pump, and decent light costs more upfront than a bag of potting mix and a clay pot.
- More tinkering – You’ll be checking pH, topping up water, and mixing nutrients. If you want a total “set it and forget it” experience, this might annoy you.
- Power dependency – Pumps and lights usually need electricity. One weekend power outage once turned my thriving lettuce into sad, limp lettuce soup.
- Learning curve – When something goes wrong in soil, plants often limp along. In hydroponics, mistakes show up fast.
So yes, it’s powerful, but not magic.
The Main Hydroponic Systems (And Which One You Should Start With)
I’ve tested a bunch of systems over the last few years. Some were brilliant, some ended in green slime and a lot of swearing. Here’s the breakdown, without sugarcoating.
1. Deep Water Culture (DWC) – Best for Total Beginners
This is the one I recommend to everyone starting out.
How it works:- Plants sit in net pots suspended above a reservoir of nutrient solution.
- Roots dangle into the water.
- An air pump + air stone keep the water oxygenated.
- Very few moving parts.
- Incredibly forgiving if you forget a check for a day or two.
- Perfect for lettuce, basil, spinach, and even compact tomatoes.
My first successful setup was a 14-gallon black tote with 6 net cup holes. I grew enough lettuce for 2–3 big salads a week, right in my laundry room.
2. Kratky Method – No Electricity “Set-and-Wait” Option
When I tested Kratky, I was skeptical. No pump? No electricity? It sounded like a Pinterest myth.
How it works:- You fill a container with nutrient solution.
- Put your plant in a net cup at the top.
- As the plant drinks water, the level drops, exposing more root surface to air.
- Zero moving parts.
- Perfect for herbs and leafy greens.
- Amazing for classrooms or ultra-low-maintenance setups.
3. Nutrient Film Technique (NFT) – For the Tinkerers
NFT is what you see in a lot of Instagram hydroponic farms.
How it works:- A shallow stream (a “film”) of nutrient solution flows down a slightly sloped channel.
- Roots form a mat in the channel and sip from the film.
I tried a small DIY NFT channel for lettuce. When it ran, it was beautiful. When the pump clogged with a stray bit of root? Plants went from “happy” to “dramatic fainting” in under an hour.
NFT is amazing but less forgiving. I’d call this a level-two project.
4. Ebb & Flow (Flood and Drain) – Versatile and Fun
You flood a tray of plants with nutrient solution, then drain it back to a reservoir. Rinse and repeat on a timer.
I like this for:
- Mixed crops (lettuce, herbs, even strawberries).
- Growers who want to experiment with different media like clay pebbles or rockwool.
It’s a bit more complex, but honestly, once I dialed mine in, it needed less babysitting than my houseplants.
The Basic Gear You’ll Need (And What You Don’t)
When I started, I massively overbought. So here’s the stripped-down list:
Must-haves:- Container/reservoir – Food-safe plastic tote or bucket, preferably opaque to block light.
- Net pots – Plastic mesh cups that hold the plants.
- Growing medium – Clay pebbles, rockwool cubes, or coco coir. I like clay pebbles for reusability.
- Nutrient solution – Buy a hydroponic-specific blend (3-part or 2-part). General Hydroponics and Flora Series are common newbie-friendly options.
- pH test kit or meter – To keep pH in the 5.5–6.5 range for most veggies.
- Air pump & air stone (for DWC) – Cheap aquarium ones are fine.
- EC/TDS meter – Measures nutrient concentration. Super helpful once you get serious.
- Timer – Essential for lights and some systems.
- LED grow light – Only if your natural light is weak or inconsistent.
You don’t need a $600 vertical tower system to start. My first working build cost less than a dinner out.
What You Should Grow First
I got overly ambitious and tried cucumbers as my first hydroponic crop. I do not recommend this. The vines took over like a botanical octopus and choked everything else.
Here are crops that actually behave and reward you fast:
- Lettuce (butterhead, romaine, leaf) – Fast, forgiving, and happy in DWC or Kratky.
- Basil – Grows like it’s on an energy drink in hydro.
- Mint – Almost too easy; it’ll take over if you let it.
- Spinach – Loves cooler setups.
- Pak choi / bok choy – Fun alternative to lettuce with great yields.
Once you’ve nailed those, then try cherry tomatoes, peppers, or strawberries.
Keeping Plants Happy: pH, Nutrients, and Light
When I finally accepted that hydroponics isn’t “fill and forget,” my results improved massively.
pH
- Most veggies prefer pH 5.5–6.5.
- At the wrong pH, nutrients are present but “locked out,” so plants act nutrient deficient.
- I check pH every 2–3 days in small systems, weekly in larger ones.
Nutrient Strength
Hydro growers talk about EC (electrical conductivity) or PPM (parts per million) to describe nutrient strength.
Rough guide from my logs:
- Seedlings: 300–500 ppm
- Leafy greens: 700–1000 ppm
- Fruiting plants (tomatoes, peppers): 1200–1800 ppm
I once cranked nutrients “because more is better,” and my basil leaves burned at the tips within days. Lesson learned.
Light
If you have a bright south-facing window, you might get away without artificial lights for leafy greens. For anything more:
- Use full-spectrum LED grow lights.
- Aim for 14–16 hours of light for leafy greens, slightly less for fruiting plants.
When I upgraded from a bargain “grow” light to a better PAR-rated LED, my yields practically doubled.
Common Beginner Mistakes I’ve Personally Made (So You Don’t Have To)
- Letting light hit the nutrient solution
- Result: Algae bloom. Green slime, gross smell, slower growth.
- Fix: Use opaque containers or wrap clear ones in foil or black tape.
- Overcrowding plants
- My first tote looked like a leafy mosh pit.
- Plants need space for airflow and light. Follow spacing guidelines just like in soil.
- Ignoring water temperature
- Warm water (~75–80°F / 24–27°C) = low oxygen and higher risk of root rot.
- Cool water (~65–70°F / 18–21°C) has been my sweet spot.
- Not cleaning between crops
- Residue + old roots = gunk central.
- I rinse with water, then wipe down with a mild bleach solution (about 1:10 bleach to water), then rinse again.
- Changing too many things at once
- I once adjusted pH, nutrient strength, and light height all on the same day.
- When the plants reacted badly, I had no idea which change did it.
Is Hydroponic Farming Right for You?
Here’s my honest take after a few years of experimenting.
Hydroponics is amazing if:
- You like a bit of nerdy tinkering.
- You want fresh greens year-round.
- You don’t have much outdoor space or good soil.
It might frustrate you if:
- You want fully hands-off gardening.
- You’re in an area with frequent power cuts and no backup.
- You mainly love the feel and smell of working with soil (totally valid, by the way).
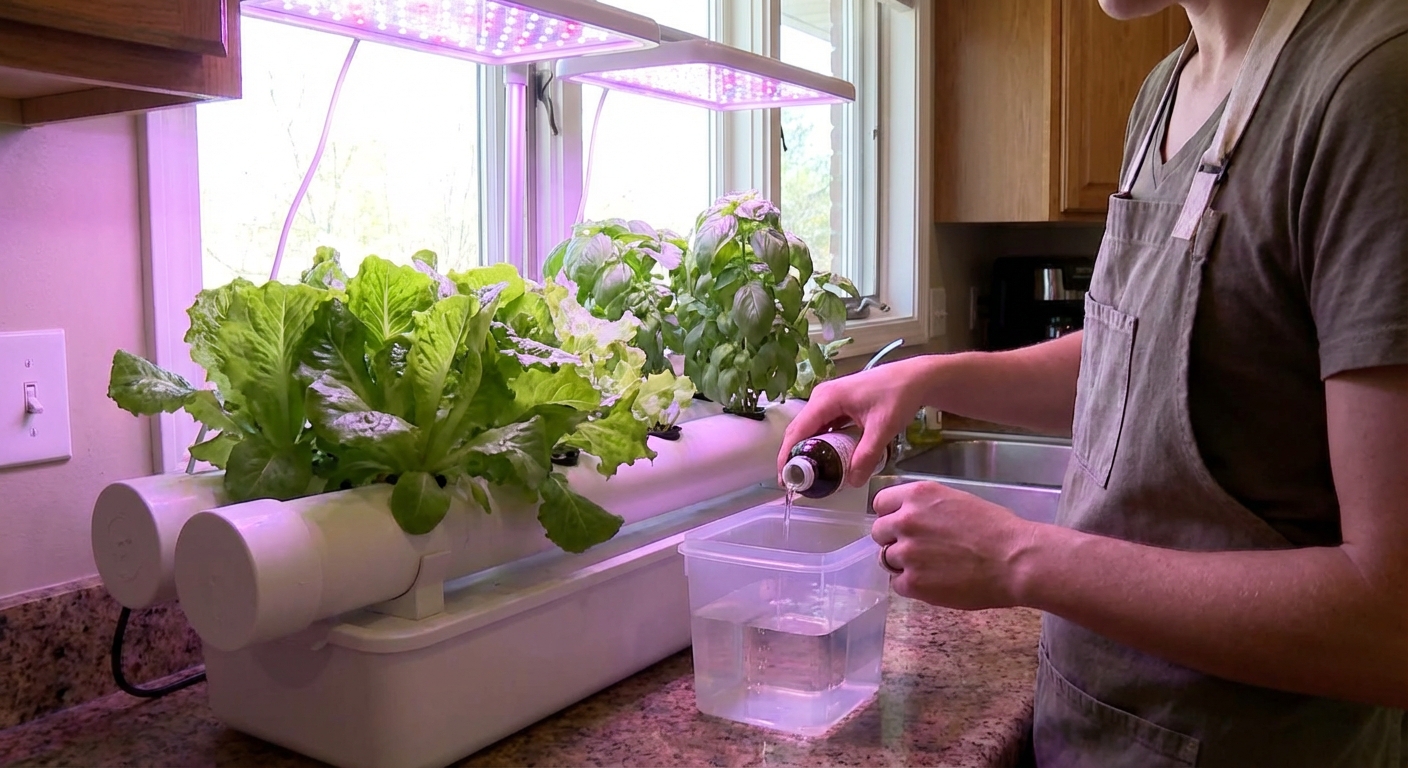
For me, it didn’t replace soil gardening—it complemented it. I still grow tomatoes in big outdoor containers, but my kitchen hydro setup keeps us in basil, lettuce, and mint even in the dead of winter.
If you start small—a single DWC tote or a Kratky jar on the windowsill—you’ll know pretty quickly if this style of growing clicks with you. And when you harvest your first bowl of impossibly tender lettuce that never saw a truck or a supermarket shelf, you’ll understand why so many of us get hooked.
Sources
- University of Arizona Controlled Environment Agriculture Center – Research - Academic research on hydroponic and controlled environment systems.
- Cornell University – Hydroponics: A Brief Guide - Practical overview of small-scale hydroponic greens production.
- U.S. Department of Agriculture (USDA) – Urban Agriculture - Context on soilless and urban growing systems from a federal agency.
- BBC – How Hydroponics Could Revolutionise Farming - General-audience explainer with examples of real-world hydro farms.
- Forbes – Inside The Vertical Farming Revolution - Industry-focused look at hydroponics and vertical farming at scale.